Wednesday, November 23, 2011

I am still scrapbooking ...honest!

Although I have been an absentee blogger, again, I am still scrapbooking. We had a friend of my husband's move into our spare room at the end of the summer and for those of you who don't know, our spare room is also my scrap space. I had no idea the impact not having my own space would have on me!! Although he is hardly ever here I don't want to infringe on his privacy and therefore haven't been scrapping as much as I would like to. I admit it, I am just too lazy to haul all my stuff upstairs after having the luxury of having it all spread out in my room. Oh well, it's not forever and thankfully I had the Two Scrapbook Friends Fall retreat to get a little of the creative angst out.

In between bouts of hysterical laughter (my tablemates were a wee bit crazy in the best possible way!) I did manage to get a few things accomplished.


I believe in scrapping the good, bad and ugly. These pics are from Wyatt's trip to the OR. He was a lot more relaxed than I was that's for sure!


Love the new canvas shapes TSF is carrying now.


As soon as I saw this paper from Little Yellow Bicycle I knew I had to have it! Unfortunately the tree paper is now sold out but lots of the other pieces are still available.


I have a feeling that part of the reason it sold out is because everyone I saw was buying two to do this layering effect on the tree.


Used up some older papers on this one and that makes ME smile!


Simple Stories makes such beautiful collections and I particularly loved the colours in this one. This was also one of my first forays into machine stitching. Thanks for the coaching Avril and Dee


These pics of my goofball crack me up. He wanted apple juice so he took a bite of his apple, poured water on it and then 'drank' it. I used a paper crimper to get the texture on the circles.


Fancy Pants papers and one button from MME. I kick myself for not buying all of these button sets as they were fabulous.


I went for the minimalist approach on this one. I had printed these pics as teeny polaroids through Picasa so I wasn't quite sure what to do.


I sprayed Maya road chipboard with mist then covered in Glossy Accents for a wet, shiny look.


I love, love, love what Avril did with this Amy Tangerine line from American Crafts so I gave it a whirl.


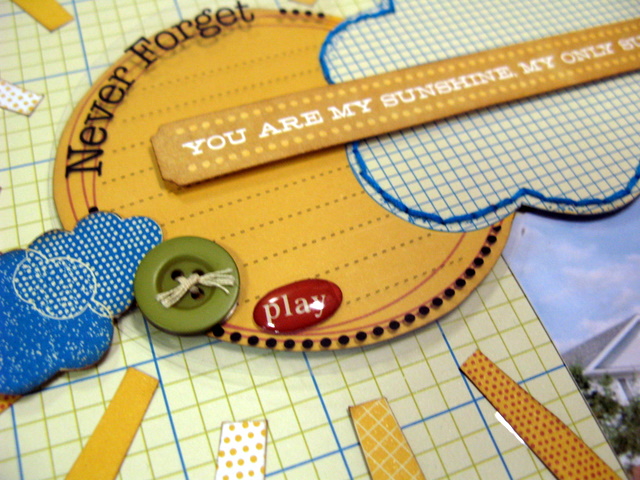
I had this Little Yellow Bicycle acrylic journalling spot in my stash so I cut it out around the cloud and tada. I also used up some old epoxy stickers, added some stitching and hand clouds. The 'you are my sunshine, my only sunshine' title is a MME sticker. I love it when I can mix new and old, it makes me happy!


I have some more layouts I need to take pics of then I will post again, I promise, before Christmas!!


p.s. One other reason I haven't been blogging is that I got an Ipad for my birthday/anniversary and it occupies entirely too much of my time and I haven't figured out how to blog with it (gotta put down the angry birds and learn soon!!!)


Friday, November 4, 2011

Friendzy Friday~Corrugated

A great way to add texture to your layouts is by incorporating corrugated letters or papers. Jillibean was one of the first manufactuers to make 'cardboard' mainstream and now many other
companies have jumped in.


I used a sheet of kraft corrugated from Creative Imaginations as a background.


Don't worry about it bulking up your albums as it's not very thick.


I used Jillibean letters and made my trees out of cardboard for a homespun feel on this Christmas layout


Another way to use corrugated letter sheets is by cutting out the negatives like this layout where I used it to show the number 7, how old my son is.


To achieve the corrugated look you can also use a paper crimper as I did on the circles of this layout.


We have lots of corrugated letters, papers and shapes in store now so be sure to check them out and add them to your next project!

Friday, September 30, 2011

Friendzy Friday ~ Thanksgiving/Halloween Dome ornaments

For this week's Friendzy Friday I am going to show you how to make something you might have seen before, especially at Christmas. I decided to change it up and make it work for October's holidays instead.
You will need themed paper, circle punch (or cut them on the Cricut etc), adhesive of choice ( I started out using terrifically tacky tape but switched to 3 n 1 Craft glue), ribbon or twine.

Choose whatever size you want for the circles depending on how large you want your ornament. I chose to use a 1 1/2 inch punch. You will need to punch 20 circles

Using a piece of cardboard punched to the same size as your circles, draw and cut out a triangle. This will be your template to fold the circles around. Place the template on top of the pattern you WANT to use and fold in.

Take 5 of the circles, adhere together with points all facing the same direction. This will form the top. Repeat to form the bottom.

Then take the 10 remaining circles and alternate the direction of the points to form a 'straight' line. Once dry, adhere the two ends together to form the center.

Before putting it all together, thread ribbon or twine through the small opening at the top of the ornament. Tie a large knot on the inside.

Adhere middle section to top and bottom and this is what you get:

I decided to try to make pumpkins too!

You could make a bunch and put them in a glass vase or hang them from everywhere!

Happy October Everyone!